...
...
...
Download pdf
| View file | ||
|---|---|---|
|
Content
Welcome to Sigma Estimates 2
...
Creating a PDF report 21
Final Words 22
Welcome to Sigma Estimates
Process Tips
This Introduction to Sigma Estimating is designed to help you get started quickly with Sigma Estimates. Sigma is structured as a hierarchical program that is familiar to anyone who has used the CSI, Uniformat or Masterformat systems.
...
Many menu items and buttons in Sigma have context help available. Simply hover the mouse pointer over an item and an informational box will pop up to explain the item’s function or provide additional information about it, such as the locations of related files.
Our Community web site (https://community.sigmaestimates.com) offers many guides and videos to help you in working with Sigma, and we offer an introductory online course and online training courses for every level of user. We also have webinars, workshops, and customized classes.
First Steps
This chapter explains the trial period and shows how to activate Sigma Estimates
...
Enter your License number in the box. When the license number is entered a


is shown.

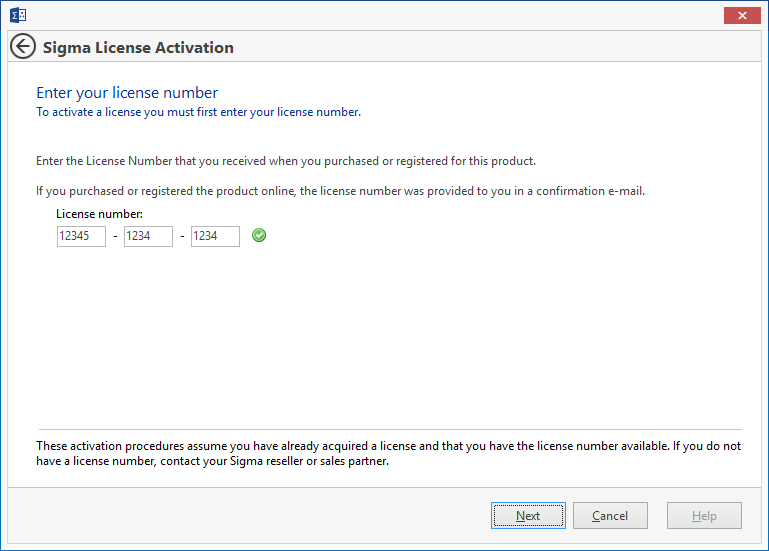
Select Next.
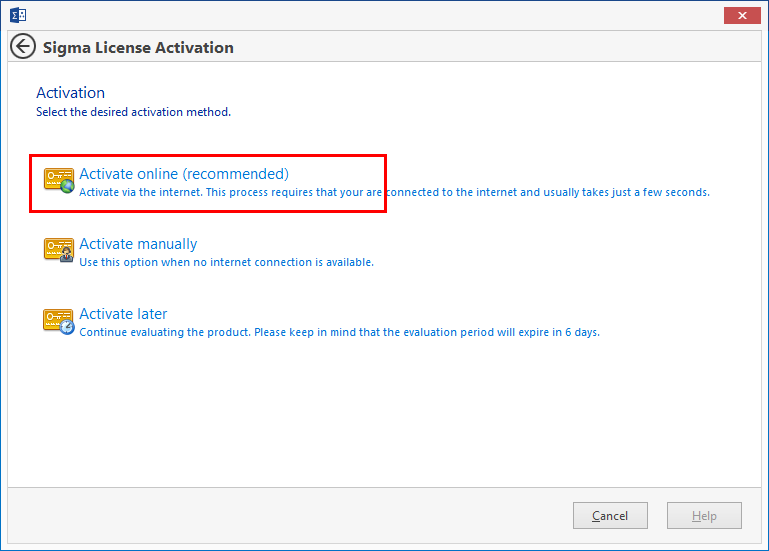
In next window click Activate Online – Sigma’s license server will validate the activation

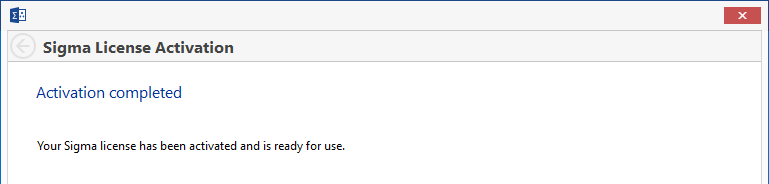
This window appears when program is activated successful

Starting Out
This chapter shows you how to begin an estimate
...
The Settings window – reached by clicking File, then Settings, controls many things in Sigma, such as the file locations Sigma uses, editing the unit and category lists, number of autosaved versions of the estimates, etc. We have a thorough guide to the settings window on our web site: Exploring the Settings Window.
Completing the WBS
Building the WBS for your estimate provides a foundation for accuracy
...
This method of building the structure is consistent throughout Sigma. The picture on the right shows the subcomponents that have been added to each heading to begin structuring the WBS. The addition of subheadings (subcomponents) can continue to any level as you see fit to organize your estimate. For instance, maybe you want to organize the HM doors by floor and then door type or the footings by type and then footing call out. Sigma can handle whatever WBS you need for an estimate. (And no, you do not have to build this every time – any estimate can be saved as a template.)
...
Adding the Content
It is time to start filling in the details of your project
...
Drag & drop can be done between libraries, from libraries to estimates, from estimates to libraries and from one open estimate to another. Sigma is also highly customizable. Columns can be added to the view or hidden, unlimited custom columns can be created, category and unit drop down lists can be edited, the estimate can be resorted based on any custom column, to name a few of the ways Sigma will adapt to your work flow and estimating needs.
Tapping the Power of Sigma Libraries
Sigma’s library system will take the repetition out of estimating
...
The number of libraries that can be made in Sigma is unlimited. Some users have libraries for labor and material. Some have a separate library for each trade. Sigma is responsive to any workflow – and the libraries support the workflow used. Additionally, any estimate can be saved as a library by clicking File, then Save as, and selecting Library in the file type drop down box.
Using the Resource Sheet
Categorized components are Resources
...
The information displayed in the Resources tab is dependent on the heading selected in the WBS. Clicking on the very top heading in the WBS will show all the resources required for the entire job. Or a subheading can be selected to see just the resources need for that work. This is illustrated in the following two illustrations. The first shows the resources needed for the entire project, the second shows the resources needed for just door Type 1A.
...

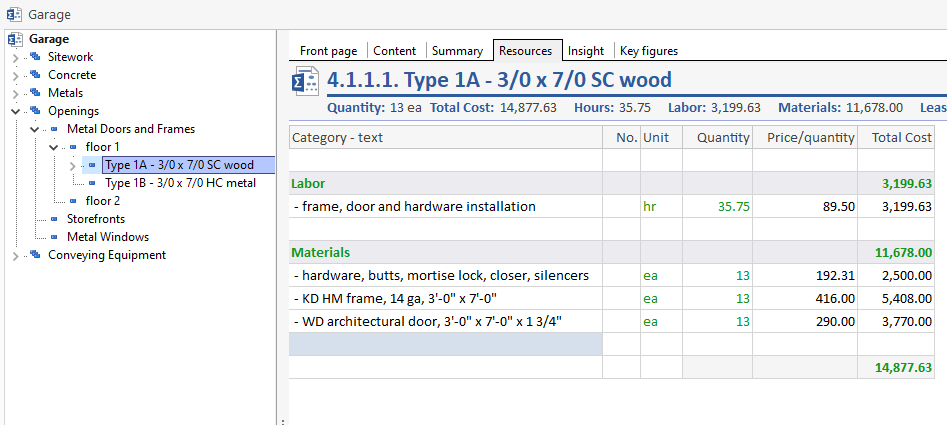
If the price/quantity is changed in the Resources tab, it will change that cost wherever the resource has been used in the estimate. For instance, the labor resource “frame, door and hardware installation” will be used repeatedly in the estimate as a labor resource for other doors. In the image below, we added two more door types and copied the installation resource from door Type 1A to each of the other three doors. By selecting Openings in the WBS, a summary of that resource is displayed, as shown below. If the price/quantity is changed from 89.50 to 100.75, that change will be made on all four instances of that resource in the estimate.
...
After clicking the Resources tab, the ribbon in the top Ribbon toolbar changes to offer other specific options. The Print icon on the far left prints whatever is currently shown in the estimating window. Selecting the columns that will be shown in the Resources view is done with the Columns button. Clicking on the Operations and Categories button will exclude or include categories or operations in the Resources tab. Click on Show Chart to get a graph detailing the percentages of the total project for each category. Clicking the “Round Up Quantities” button will round all quantities to the next highest amount. Clicking it again, returns them to their original values. The Change Category button will – surprise – offer the Category drop down list so that the category of the selected item can be changed.
Setting the Sales Price
Use the Summary Sheet to add Overhead and Profit
...
Since any number in black can be edited in the Summary window, a last-minute change to the estimate is always possible and easily made. In the pictures below the Sales Price for Curbs is originally 1,400.00. If the sales price is changed from 1,400.00 to 1,540.00, the difference will be noted in the MM (Manual Markup) column. To return your estimate to the original sales price simply change the 140.00 in the MM column to zero.
...
...
Creating a PDF report
Share your estimate by creating a PDF
...
A logo can be added to the reports by clicking on Settings in the Report ribbon, and selecting Logo, then browsing to the file location of the logo.
...
Final Words
Thank you for investing your time in Sigma Estimates. We hope this manual gave you a quick start and a good understanding of Sigma basics. With the knowledge obtained from this manual, you should be able to complete your estimates faster and with more accuracy. All new routines and methods take time to learn and get comfortable with, and we understand that. Support is always just a call, chat or email away.
...